Spangenhelm
Armour has one main function; that is to protect the body. A helmet that was easy to construct, cheap to produce and did the required job was developed in the post-Roman period and continued in use for almost 500 years.
A spangenhelm is a basic plate armour helmet. Spangenhelms are held together with metal rivets as opposed to welded seams, so they are very easy to consruct and can be built from basic sheet metal without the need for a forge. This is a particular advantage on campaign or for nomadic tribes.
The name comes from the german for a brace or support and this describes well the method of construction. A series of three iron bands are rivetted together. these bands provide the structure and shape of the helmet.
Holes are drilled around the four resulting curves and shaped triangles of plate iron are inserted and rivetted to the structure.
A further set of holes can be drilled at the rim to lace in four cloth or leather triangles which can be joined at the tip to produce a comfortable and adjustable fit.
History of the spangenhelm
The spangenhelm first evolved in the nomadic tribes of southern Russia and Ukraine, spread westward with the scythians and became the most ubiquitous helmet design of the early middle ages in Europe.
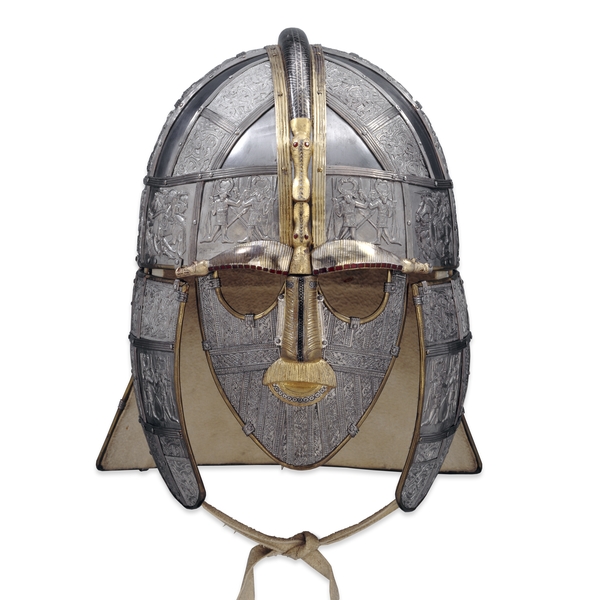
Since the early 7th century AD England, a ship-burial at Sutton Hoo lay undisturbed until the mid 20th century. When it was excavated by archaeologists the spangenhelm they found was without doubt one of the most beautiful pieces of armour ever seen. The original Sutton Hoo spangenhelm and a replica spangenhelm are now on display in the British Museum on London. On top of a basic structure there is masses of ornamentation. This was cleaqrly the helmet of a very powerful man.
Many examples of the much more basic spangenhelm can be seen in Bayeaux, Northern France on the famous Tapestry which was sewn to comemorate William of Normandy's successful invasion of Britain in 1066.
Cheek flaps, noseguards and ornamentation were optional, but the basic pattern of plates and bands held sway until around 800ad. When worn in combination with a chainmail coif (head protector) the spangenhelm was a relatively cheap and effective form of armour.
The jointed construction was an inherent weakness of the design and so single piece beaten helmets or welded designs such as the crusader helmet, or pot helm were eventually to superceed the spangenhelm.
Make a cardboard spangenhelm.
The simple design of a spangenhelm lends itself to reconstruction in other materials. This is great news for educatiors seeking to bring the period to life. A cardboard and papier mache spangenhelm is easy to make, costs virtually nothing and can look amazing.
Use cardboard for the 'spangen' straps and make curved papier mache triangles for the plates. Join it all together with brass paper fasteners (and a little glue).
Plans for a cardboard spangenhelm
Since these helmets were made in a time before mass manufacture, it would be inappropriate to work from plans as such. The right way to go about it is tocut a strip of card about 1.5 inches wide and the same length as the circumrence of the wearer's head.
Join the ends to make a circle. Masking tape is fine for the purpose but if you intend to paint the helmet later on then avoid using plastic tape. Now cust anout strip of the same width, long enough to go across the top of the head, joining the circular band at each end above the ears.
A third carboard strip should be cut to go from the back of the head, over the top of the other band at the top of the head and down to the tip of the nose.
Once these three are joined together you need to make the four plates of armour to fill in the gaps. An appropriately sized pudding basin will suffice to act as a mould for making a curved bowl from papier mache when this is dry it can be cut into four pieces with are then attached with glue to the inside of the helmet.
Finally the paper fasteners are pushed into the cadboard spangen strips at equal intervals to represent the iron rivets of a real helmet. Now you can paint the whole thing,. To give it an authentic metal look, first paint with matt black and then apply a very light coating of metailic paint. Many artists spray metal paint onto a rag and then wipe it over the matt black to give a remarkeably impressive effect of real iron armour.
Other materials such as foamcore or plastic would be equaaly good for this history/craft project. Of course the best material would be iron or steel, in which case the resulting helmet would be pretty much indistinguishable from the real thing.